Sayonara Riviera
It’s a bittersweet conclusion to the guitar that inspired me to start this blog back in 2009. I finally sold my Epiphone Riviera P-93. Let’s be honest, the idea of this guitar was always better than the reality of it. The reason for all of my experiments and tweaks was that I wasn’t satisfied with how it sounded. Turns out, a pair of nice humbuckers would have been a much better fit for me than three dogear P-90s.
I purchased this guitar in July 2009. I had always wanted a semi-hollowbody like an ES-335 or a Sheraton, and I was seduced by the Riviera’s sexy curves, the lovely wine red finish, the Bigsby and the low price. Somehow I failed to take into consideration the pickups and flawed control scheme. By September, the honeymoon was over, the return period was expired, and I was looking to make changes. I was frustrated by the dull sound, and the 3 volume 1 tone control scheme had some significant limitations.
I started this blog with my first post promising a diary of my tweaks and upgrades. And so began a long series of experiments. In hindsight, the correct solution to my buyer’s remorse would have been to sell the guitar and move on. But it has been educational in many ways- I learned a lot about guitar electronics, I did some valuable experiments, wrote a bunch of blog posts, made a bunch of youtube videos, and now here we are, nine years later. While this certainly isn’t the end of this blog, it’ll likely be the last post about the Riviera P-93.
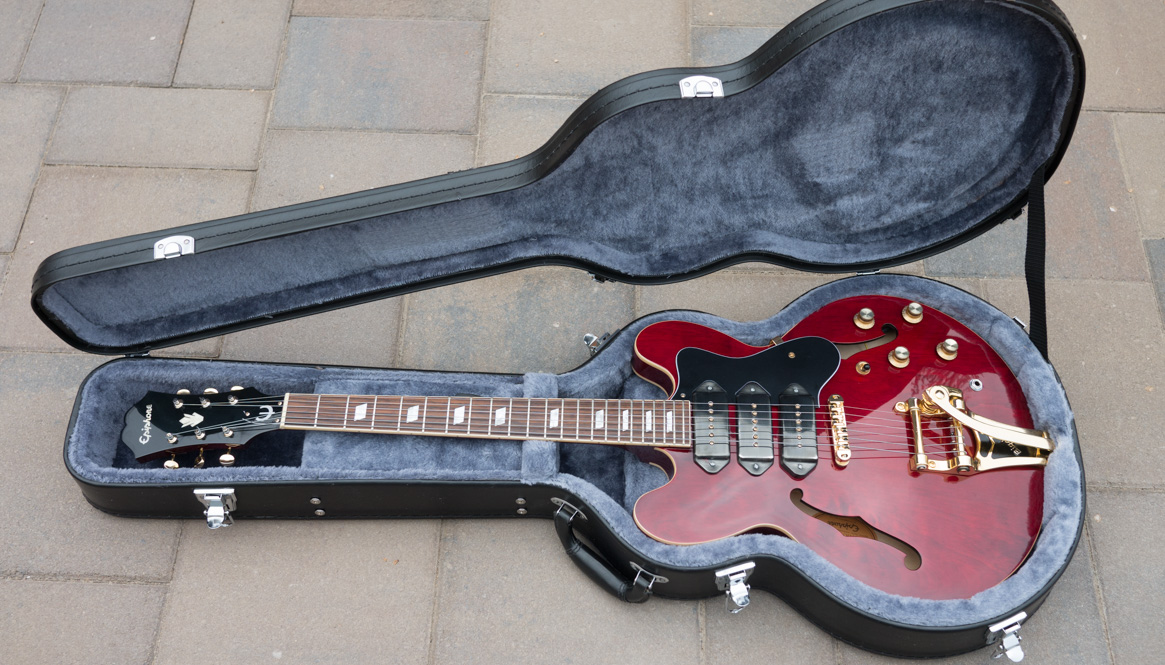
In preparation to sell, I gave the guitar a thorough detailing and restoration, returning it mostly to its factory state. There are 9 years between these two photos:
I assumed that the guitar would be easier to explain and sell without my electronics mods. So, I left the roller bridge, new jack and pots in there, but put everything else – pickups, knobs, control wiring – back the way it was when it was new. And this would give me the opportunity to separately sell the awesome Vintage Vibe Guitars pickups to try to recoup some of my investment. Get in touch with me if you’re interested in a nice matched set of VVG pickups! [Edit: Sold!]
In removing all the electronics, I was reminded just how painful it is working through the f-holes in a semi-hollow body! It’s time consuming and frustrating. I still find the body shape undeniably appealing, and I won’t rule out ever owning another ES-style guitar. But I certainly hope I never again have to work on guitar electronics through the f-holes.
After removing all the hardware, I gave the guitar a nice polish. Here are a few shots before showing mostly fine hairline scratches, and a mystery long black mark on the back.
I wrapped the neck with blue painters tape and stuffed the cavities with paper towels. I followed the same approach shown in my polishing tutorial, using my Bosch Random Orbit Sander, Sponge Pad and Buffing Disc along with the Turtle Wax Rubbing Compound, Polishing Compound and Scratch and Swirl Remover and tons of paper towels. I polished the front and back of the body, the headstock, the pickguard and even the truss rod cover.
The original metal pickup covers looked a little rough, so I gave them a “brushed metal” appearance using a synthetic steel wool pad.
The results were outstanding:
I used standard Brasso to polish the Bigsby, bridge and tuners which showed a little bit of corrosion and wear. Check out these before/after shots:
Here I am right before walking out the door to meet my buyer. Yes, it was a bittersweet moment – I’ve spent countless hours (not to mention blood sweat and tears) on this guitar and related project tweaks, experiments, videos, etc. But, I must admit that it feels good to close out this chapter, and move on.


July 14, 2018 @ 10:54 am
Great job. it’s hard to let go of your Baby, but when passing such a project on to the next guy, it’s nice to see an aficionado at the other end who has the class to leave a project better than when he found it!
July 15, 2018 @ 6:25 pm
Thanks for the kind words, Tom!
-John