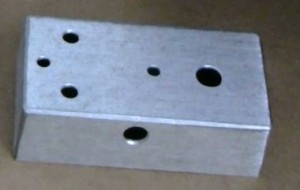
Drilling the Enclosure

- Intro to DIY Pedal Building
- Beginner’s Course in Sketchup, Modeling a 125B Guitar Pedal Enclosure
- Drilling a 125B Guitar Effects Pedal Enclosure
- Pedal Enclosure Finishing: Surface Prep, Priming and Painting
- Using GIMP to Create Pedal Artwork
- Printing and Applying Waterslide Decal to Pedal Enclosure
Now that we’ve modeled the enclosure and printed a drilling template, we’re ready to jump out of Sketchup and into the real world.
In this video, I’ll be demonstrating how to accurately drill the holes in a diecast aluminum 125B guitar pedal enclosure, preparing to install the electronics. I’m using the drilling template we printed in part 2. The pedal I’m building is a modified Ross compressor, using a printed circuit board purchased from GuitarPCB.
Funny, I just noticed while reviewing the final video edit that I was saying “barrel” instead of “bezel” for the LED bezel. I guess I was channeling my inner Cooper.
Some of the resources used in this video:
- Carl Professional Rotary Trimmer
- Automatic punch
- 3/32” drill bit- always handy. Buy a cheap 10-pack in case you break one.
- Unibit stepped drill bit. I’ve since purchased this unbelievably cheap set from Harbor Freight which has steps down to 1/8”
- Round file
- Fractional calipers – one of my favorite tools
- Weller WES51 soldering station
- Pot back covers – or just make your own with heat shrink, or electrical tape
- See more pedal-building resources in the Intro to DIY Pedal Building
September 7, 2012 @ 9:04 pm
September 7, 2012 @ 9:12 pm
September 7, 2012 @ 9:22 pm
September 7, 2012 @ 10:26 pm
September 8, 2012 @ 10:25 am
December 25, 2012 @ 3:13 pm
September 7, 2012 @ 10:39 pm
September 8, 2012 @ 10:27 am
September 8, 2012 @ 3:26 pm
September 8, 2012 @ 5:53 am
Finishing the Enclosure -
September 28, 2012 @ 6:06 pm
[…] previous posts, we modeled the enclosure in Sketchup, drilled it, and now we’re ready for paint and artwork. In this video, I talk about options for […]
Using GIMP to Create Pedal Artwork -
October 15, 2012 @ 10:09 pm
[…] next step in finishing up the pedal that we’ve modeled, drilled and painted previously, is to prepare the artwork and […]
Waterslide Decals -
December 17, 2012 @ 12:23 pm
[…] the pedal, and apply a durable clear finish. In previous videos, I showed how to model, drill, and paint the enclosure, and design and prepare the artwork and labels in […]
April 17, 2013 @ 5:57 pm
June 6, 2013 @ 11:43 am
any suggestions?
June 6, 2013 @ 3:11 pm
Better idea- use round DC jacks 🙂
July 28, 2013 @ 2:30 pm
September 3, 2013 @ 2:20 pm
January 2, 2014 @ 8:43 am
stores for busted pedals. I advertise for busted pedals in any condition. I
rarely pay more than $10. I get an enclosure and spare parts to boot.
Special switches, jacks, controls, 9v clips, caps, resistors for other
projects. A lot of times I buy a pedal that is easily repaired. It saves a
lot of time & money.
January 11, 2014 @ 5:20 pm
March 10, 2014 @ 12:11 pm
upgrade 🙂
March 29, 2014 @ 3:16 pm
June 6, 2014 @ 9:28 am
HSS drill bits and a 500W with 3000rpm drill. Do I need to buy better
drills?
July 19, 2014 @ 9:03 am
good finish 🙂
December 12, 2014 @ 10:13 am
January 11, 2015 @ 6:37 pm
January 12, 2015 @ 5:12 am
kills the vacume?!?
March 9, 2015 @ 5:23 pm
July 7, 2015 @ 1:59 pm
November 30, 2015 @ 9:07 am
Hi Jonh, amazing page. Do you have the layout of the 3PDT PCB you used ? I’ve been trying to look for a good one.
November 30, 2015 @ 9:54 am
I used an earlier version of this 3PDT board from guitarpcb:
http://www.guitarpcb.com/apps/webstore/products/show/3436229
-John
November 30, 2015 @ 10:23 am
Oh, i thought it was a DIY version, thanks for the quick response i really appreciate.
Intro to DIY Pedal Building - Planet Z
September 1, 2016 @ 11:00 am
[…] Drilling a 125B Guitar Effects Pedal Enclosure […]
Sketch Me Up! - Planet Z
September 1, 2016 @ 11:01 am
[…] Drilling a 125B Guitar Effects Pedal Enclosure […]
Finishing the Enclosure - Planet Z
September 1, 2016 @ 11:06 am
[…] previous posts, we modeled the enclosure in Sketchup, drilled it, and now we’re ready for paint and artwork. In this video, I talk about options for finishing […]
DIY Guitar Pedal Building Series - Planet Z
September 1, 2016 @ 11:49 am
[…] Drilling a 125B Guitar Effects Pedal Enclosure […]