Drilling for Pickups
In part 3 of the video series on installing pickups, I select some screws and show some tricks for drilling the holes right where you want them.
For the screws, I chose some slotted silver 3/4” long #4 wood screws. Even though the Bigsby and tuners are finished in gold, I think these silver screws will look good with the polepieces.
Since the new holes will overlap a bit with the old filled holes, the drill bit will have a tendency to walk into the old hole. The bit always wants to take the path of least resistance. I’m using a Rockler Self-Centering Bit, which makes it really easy to drill precisely centered holes – it’s good for things like door hinges and cabinet hardware too. If you don’t have one of those, the next best thing is a brad point drill bit, which has a sharp spike to prevent the bit from shifting. With a brad point bit or regular bit, you’ll want to use something sharp like a drill punch or awl to give the drill bit a good starting point.
Positioning Pickups Before Drilling
This is part 2 of the video series on Replacing Pickups in a semi-hollowbody guitar. Here, I show some common-sense tricks for properly positioning the pickups front-to-back and side-to-side on the guitar, without having to make lots of measurements, etc. To place the pickups parallel with the edge of the fretboard and parallel with each other, I use spacers. You can experiment with spacers of different sizes to find a good fit – I’ve used pens and pencils and scrap wood. Just make sure the spacer is equal in size along its entire length – avoid tapered pens. Here, I’m using drill bits wrapped in tape, since my bit set has so many choices in size. I also show a way to use the low and high E strings as a straightedge when aligning the pickup polepieces under the strings. Note, in the video, I didn’t realize the camera was slightly angled when showing the pole piece alignment, so it’s not as
Note to self: next time, set the camera to proper manual focus before doing those closeups!

Building an Acoustic Guitar
It has long been a dream of mine to combine two of my hobbies – guitar and woodworking – and build my own guitar from scratch. Some day…
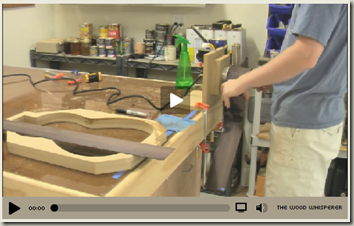
Today, Marc over at the The Wood Whisperer posted part 1 in a new video series Birth of a Guitar, documenting Rick Urschel’s classical guitar project. The video really shows how many steps are involved in building an acoustic guitar, and how many diverse skills are required. Just imagine what it was like building such a guitar in the days before power tools! Even with modern tools, it’s a gargantuan effort.
Replacing the Pickups
I’m finally all set to replace the pickups on my Epiphone Riviera P93. I’ll be using a set of Vintage Vibe Guitars height adjustable dog-eared P-90’s. I’ll do a detailed review of these pickups later, but for now I’m focusing on how to do it.
In part 1 of this video series, I remove the old pickups, position the new pickups using a spacer, decide if the existing holes can be reused, and then show how to fill the existing holes in preparation for drilling new ones. I was planning to use a 1/8” dowel to fill the holes, but it turned out that the factory positioned some of the holes too close to the edge of routed recesses, and the screws had breached through the sides. So instead of dowels, I’m using Elmer’s Carpenter’s Interior/Exterior Wood Filler.
Evolution of a Blog
Hey there. This is my first post that isn’t about guitar.
It has been just a few months since my first blog and video post, and there have already been nearly 20,000 views of my guitar videos on youtube. I never could’ve expected that!
It’s been an interesting evolution for me. This started out on a whim, recording a quickie review of my new guitar on my crappy webcam and throwing together a video in Windows Movie Maker. Then, as I started tweaking the electronics in my guitar, it evolved into a video diary of sorts. Now, I’m recording in high definition on a nice camcorder, with multiple microphones, close-ups, various camera setups, and using Sony Vegas Pro to edit it all together, with countless edits in each video!