Vox SSC33TB Guitar
I recently had a chance to play the new Vox SSC33, and it’s a thing of beauty. This is the mid-priced 33 series guitar, in the single cutaway, teaburst finish, with an ash top, mahogany body and neck, and rosewood fretboard. It’s an incredible value when you consider it shares the same MaxConnect aluminum bridge, CoAxe pickups, and super-smooth tuners as Vox’s higher end 55, 77 and Virage guitars. And it comes with a really nice padded gig bag.More
What’s In The Cabinet?

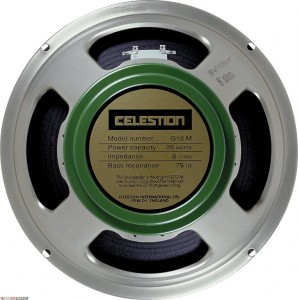
Both amps use the same Celestion Greenback G12M speaker, and these two here have each been played about the same amount, so they should be “broken in” evenly. More

Anatomy of a Logo
I recently unveiled a new planetz logo in the intro of my AC15 Comparison video. Here’s the story.
In January 1999, when I launched my original website at planetz, I asked a brilliant digital artist friend, John Weir, to make a logo for me. He used a Mac and an SGI workstation, with programs like Adobe Photoshop and Fractal Design’s Painter, and produced a really interesting and unique piece of artwork for me:
Years later, when I asked him how he had produced it, he couldn’t really remember all the details other than “massive amounts of layers, filtering, distortion, plugins, etc”. And unfortunately the original file was lost, so he couldn’t give me a higher resolution version of it.
I really liked the rich colors, the cool “bubbles” and raking effects, and low-fi distortion of the characters making up the word “planet”. But, I always wished I had a larger, higher resolution version of it, especially as I started to get into high definition video. Also motivated by the shift to high definition video, I needed an image that didn’t crop so closely to the letters. And I kinda wished the Z was a bit curvier too.
So I recently set out to reproduce the logo from scratch, in a larger high resolution format. There’s no way I could make it identical, but I wanted to make something new, inspired by the original.
Using the free open source graphics editor GIMP (which has a lot in common with Photoshop), I spent countless hours experimenting and tweaking. I learned a lot, and made some interesting discoveries along the way. Here’s the finished result:
What follows is a detailed step-by-step guide for making this logo. More
Vox AC15 Comparison
In this video, I review and compare these two excellent VOX AC15 amps, the AC15C1 Custom, and the AC15HW1 hand-wired.These amps are similar in many respects:
- same Celestion Greenback G12M speaker
- same preamp and power amp tube complement (3 12AX7’s and 2 EL84’s)
- same two channels: Normal and Top Boost.
- same tone cut and interactive EQ controls
- same weight – 48 pounds. Handwired is larger but birch plywood is lighter than MDF
- same AC15 legacy and tradition

Catching up on mail and videos

I also want to express my gratitude for the many kind thank you’s and great job’s I’ve received—these messages really do make it all worthwhile. I don’t have time to individually respond to every one of you, but please know that I really appreciate the kind feedback!
In other news, my next video, comparing the Vox AC15HW1 and AC15C1 has been stalled for the last couple months, due to hangs and crashing in my video editing software of choice: Sony Vegas Pro. I’ve been working with Sony tech support on tracking down the cause of the bugs. Meanwhile, I’ve restarted my project from scratch several times now, and I’m starting to go a little stir-crazy. I shot all the video in December, so it’s starting to feel ridiculous that I haven’t been able to get this out yet. Hopefully I’ll get er done in the next week or so.


